Giant Old Books
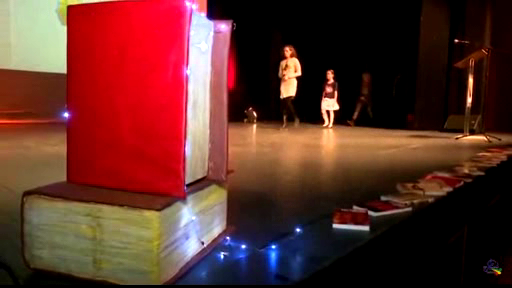 |
| Giant Old Book Stage Prop |
I spent hours and hours scrolling down on Pinterest to find ideas for school day prop. I came up with this idea: giant books. I found some good examples, I called my father, got some boxes and went into adventure. I must say that this project is rather demanding. It took me 15 hours of work to finish my two lovely books. The whole project is improvised, so I used different material on my books.
I hope that this post can help you to have courage to make prop on your own, and you should know one thing: it WILL get messy.
So here are some materials and tools that I used:
acrylic paint
hot glue (gun needed)
paper
cardboard
Styrofoam board
brushes
pencil
faux leather
cardboard box
sandpaper
Here is my first book.
It is made from sturdy paper box. The nice slope that you can see is made by gluing sculpted Styrofoam board with sandpaper on the longer side on the box, and than I covered it with cardboar that presents book covers.
I glued regular paper sheets between covers and painted it with normal acrylic paint and I used also acrylic colored pencils to draw pages. It does not have to be perfect. And finally I painted the covers with red acrylic paint.
Here it is before I drew pages.
 |
| Giant Book Prop |
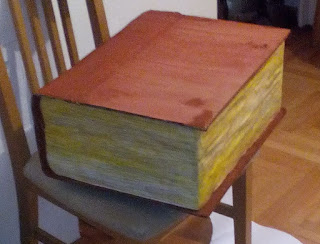 |
| Freshly painted book |
 |
| Freshly painted |
I even made candle out of Pringles container, I glued paper on it, painted it and put some hot glue on it.
 |
| Big Book Stage Prop with Candle |
For second book I used faux leather for covers. I glued it on the cardboard panels. Here is the result.
 |
| Big Boo |
Since my brother in law is big fan of Nintendo games. He asked me to make him a beanie with Link from The Legend from Zelda. He made a drawing with pixels. I think that pixels are easier to create with Tunisian crochet technique. It came out pretty neat, but only downside is that this technique uses a lot of yarn and it makes very thick surface. The hat came out to be very warm. I did not have special hook, so I glued two regular crochet hooks to create one long hook. I used tape to do this. I recommend using one bigger, and one smaller hook, so that yarn can slide easily.
Since It was the first time I used Tunisian crochet, I did a patch with the picture separately from the body of the beanie. Later on, sewed the patch and the hat.
Since It was the first time I used Tunisian crochet, I did a patch with the picture separately from the body of the beanie. Later on, sewed the patch and the hat.
 |
| Pixel art Tunisian crochet beanie |
Black double crochet shrug
I have finally decided to crochet a shrug. Since it is already spring time I did not want it to be two warm. I used double crochet and for the lace effect I skipped every fifth loop. I didnt have any pattern so it is very random. I crocheted only in back loops. Very important thing about this shrug is that you have to iron it with steam to achieve flatness and lace look.The size of the yarn is 5, and that is the size of my hook. It is in millimeters. The shrug is pretty long but it can be converted to look short by folding the upper part.When I finished the main form I did crocheted borders of the shrug with single crochet twice.
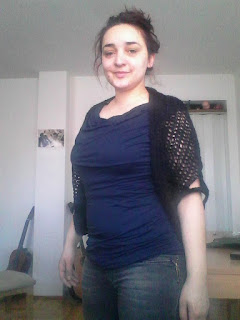  |
| Black lace crochet shrug |
Here is my newest baby blanket. It is done in single crochet but I added these cute waves and puff stitch around it. The tutorial for waves can be found here: https://www.youtube.com/watch?v=pEeHMk75z50&t=539s
I also made a basket with the rest of the yarn. The bottom part of the basket is really thick because I doubled my yarn that is meant for the five size hook.
Size of the blanket is 100 x100 cm.
I also made a basket with the rest of the yarn. The bottom part of the basket is really thick because I doubled my yarn that is meant for the five size hook.
Size of the blanket is 100 x100 cm.
 |
| Mint baby blanket and basket |
 |
| Nature inspired baby blanket |
 |
| Mint Color Baby Blanket |
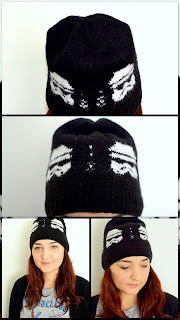 |
| Stormstrooper inspired beanie |
Stormtrooper Knit Beanie
Here is very short presentation of my Stormtrooper knit beanie.
For the pattern I used pixelated chart that I found here:
https://www.pinterest.com/pin/260927372136057975/.
So, as you can see the width of the Trooper is 17 pixels, if you count rows 14, 13, 12, 11 and 10.
Since I am a beginner, I do not knit with more that two needles. I starter from the bottom with rib stitch and then proceeded to my pattern.
The width is total of 121 stitches. I did not count height, because everyone can decide when is their beanie long enough. As for decreases, I did some decreasing, but it is not necessary. If you decide to decrease, be very careful, do decreases gradually: one row decrease, than tree rows without decrease ets.
 |
| My super lazy chart |
I made number chart for the first row of my pattern and the numbers are in the color of my yarn.. So this is the first row - THE ONE WHERE YOU START CHANGING COLORS.
I added some white decorations(stitches) between the Stormtrooper because it made shorter jumps for the yarn when I changed colors.
I finished my work with mattress stitch and I ironed it with steam. DO NOT PUT PRESSURE ON YOUR WORK WITH IRON.
Needles are connected with cable and its size is like 2,5 (nothing is written on them).
 |
| Needles and yarn I used |
The front and the back of my beanie:
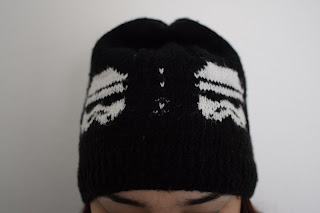 |
| The force is with me |
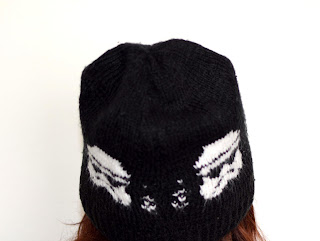 |
| And from the back |
I have finally finished my blanked. It is nothing special, but I love these colors. I have found in local shop this light blue and creamy white, it has a shade of white coffee and additionally it has some brown parts that look like the yarn is sprinkled with chocolate chips. I think that is suitable to be used as a baby blanket or as chair cover. Anyway It looks gorgeous, especially with bobble stitches on two sides.
 |
| Cozy crochet blanket and my tiny library |
 |
| Crochet blanket as chair cover |


